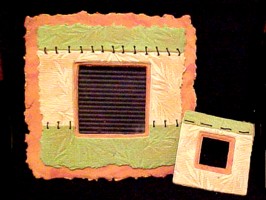
Spiced Frames
Designer - Shirley Rufener, CPDImagine that you could turn Delight™ modeling clay into artistic frames, just by raiding your kitchen cupboards! By blending in a few spices you can give your project interesting texture and a great scent at the same time!
Supplies
Delight™ air dry modeling compound (White, Red, Yellow & Blue)
Natural color spices (I used dill weed & course ground garlic pepper)
Shade-Tex® plastic rubbing plates (linen textile & parallel lines design)
Large Rollagraph® leaves wheel and handle
Rust color Decorating Chalk or pastel
Aleene's Tacky Glue
Aleene's Platinum Bond 7800 clear all-purpose adhesive
Acrylic roller tool, smooth straight drinking glass or a pasta machine
Baby powder or cornstarch
Large soft bristle paintbrush
Large sewing needle or needle tool
Large ziploc type plastic bags
Set of graduated size square cookie cutters
Craft knife or old scissors
4" piece thin wire or beading needle
Black beading thread/string
3 1/2" x 5" bent acrylic self standing frame
Magnet for small frame
How-To:
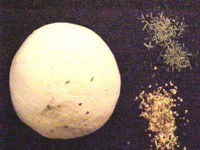
1. Mix a very small amount (marble size when finished) of 12 parts yellow, 2 parts red and a pinch of blue Delight™ clay to create a brown mustard color clay.
2. Mix mustard clay with 1/2 package white Delight™ and 1/2 tsp. of each spice to form speckled beige.
3. Roll 1/3 amount of beige clay to 1/8" thick (pasta #1 setting). Dust rubbing plates with baby powder using paintbrush, and press onto clay to texture. Roll over clay with stamp wheel. Cut a 2 1/2" x 5" rectangle. Lay flat in sealed ziploc for now.
4. Mix half of the remaining amount of beige clay with a 1" ball of yellow and a 1/4" ball of blue. Roll green mixture to 1/8" thick (pasta #1), texture as in step two above and cut a 1 1/2" x 5", and a 1" x 5" rectangle. Lay flat in ziploc.
5. Mix remaining beige clay with 1" ball of yellow, 1/2" ball of red and a 1/4" ball of blue. Place ball of brick mixture in a ziploc.
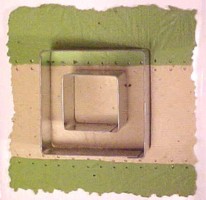
6. Assemble clay strips overlapping 1/8". Cut square opening (and a smaller opening in small frame). Remove clay and cutters and 'tear' outer edges of large frame.
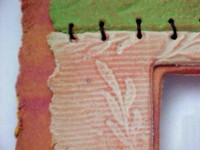
7. Poke holes with sewing needle 1/2" apart, 1/8" from both sides of seams. Highlight raised texture with rust chalk using fingertip (see photo below). Allow to dry flat for several hours.
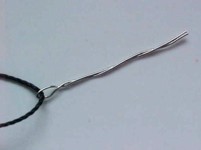
8. Fold wire in half over thread and twist to make a home-made needle. Stitch through dried clay frame holes as shown.
9. Roll brick color clay to 3/16" thick and cut a 6" square. Tear edges and cut a square opening with one size smaller cutter than beige frame opening. (Form a small brick color frame to back small beige frame.)
10. Apply a thin layer of glue on back of beige frames and secure to brick backing. Allow both to dry flat. Secure large frame to acrylic frame (and magnet to small frame) with 7800 adhesive and allow to dry flat. Add photos and enjoy your works of art!