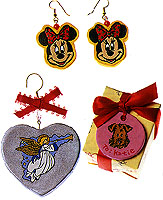
Rubberstamp with Paperclay
Materials:
- Creative Paperclay® modeling material
- Rubber stamps
- ColorBox® Pigment Stamp Ink
- Wax Paper Or A Plastic Sandwich Bag
- Scissors, Cookie Cutter Or An X-ACTO® Knife
- Acrylic Paints And A Paintbrush
- Spray Lacquer
Procedure:
- Flatten Paperclay® between two sheets of waxed paper or an opened plastic sandwich bag with the wooden back of a large rubber stamp until it is about 1/4" thick.
- Load your rubber stamp with pigment ink and gently stamp on the flattened Paperclay®.
- Cut the stamped image out of the Paperclay® with scissors, cookie cutter or knife.
- Let your pieces dry a day or so or put them in the oven for about 40 minutes at 250 degrees. Be sure to turn them over after they are half dry so both sides can dry evenly.
- Paint as desired.
- After the paint dries, spray with lacquer.
Tips:
To make button covers or pins, glue the hardware on the back of the stamped Paperclay® pieces after the lacquer has dried.
Jewelry findings, beads, etc. can be pressed into Paperclay® while it is still moist and will generally hold after the Paperclay® dries.
To create a reverse image, stamp firmly into Paperclay® without using ink. Let the Paperclay® dry and gently sponge on paint.
Watercolor stamp ink will tend to run after stamping in moist Paperclay® and leave a blurry image.
Stamp design: © Walt Disney Co. - Made under license exclusively by Rubber Stampede®
© Comotion® Rubber Stamps, Inc. © Stampendous®, Inc.
