
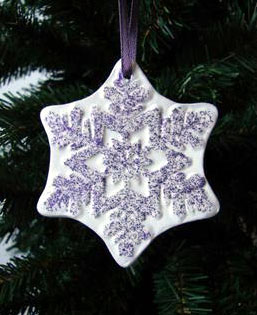
Papier Glitter Snowflake Ornament in Delight™
by Vickie Kammerer
Materials
- Delight ™ Air Dry Modeling Compound
- Creative Hands Foam Sheet
- Folk Art Papier ™ Glitter Purple
- Krylon ® Workable Fixatif
- Bold Snowflake 450J (All Night Media)
- Wax Paper
- Rolling Pin or Piece Of PVC Pipe
- Clay Tools
- Ribbon
Create this lovely Snowflake Ornament using Delight™ air dry modeling compound.
Instructions
1. Cut a section from foam sheet slightly larger than stamp. Heat both sides of foam till soft and glossy.
2. Immediately press stamp onto hot foam. Press firmly and hold for a few seconds. Lift off stamp. You now have a reverse image of your stamp.
3. Open a pack of Delight™ Air Dry Modeling Compound and remove a generous wad. Seal the remainder in an air tight bag. Roll wad of Delight onto wax paper approximately the size of foam piece and approximately 1/8 inch thick.
4. Now place Delight piece on foam image and roll over once in all four directions to even clay and to impress the image. Do not over roll or clay may slip off and you will smear image. Lift off foam piece gently.
5. Trace around raised stamped image with a clay tool or tooth pick. Smooth edges with your finger and re shape any points if necessary. Lay flat to dry.
6. After snowflake ornament has dried take selected color Papier Glitter and squirt a small amount onto a paper plate.
7. With Kleenex or your finger take a very small amount of Papier Glitter and rub over raised areas. Start with very little and add more as needed. It is easier to add than to take away.
8. Spray with Workable Fixatiff.
9. Make a hole in one of the snowflake points with an awl or clay tool.
10. Feed ribbon through the hole, knot and make a bow.
Tip: Do not bake Delight™ air dry modeling compound in the oven.