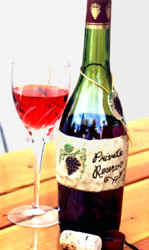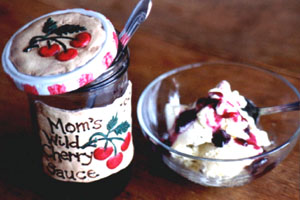
Embossed Paperclay® Labels
Designer - Karen Booth
of Sidney, B.C. CanadaMaterials:
- Creative Paperclay® modeling material
- Heritage Molds by Creative Paperclay® or similar cookie molds
- DecoArt Americana Acrylic Paints, multi-purpose sealer and satin varnish
- DecoArt Heavenly Hues of Color
- Aleene’s Tacky or white glue
- Rolling pin
- Plastic Wrap
- Small knife
- Permanent markers
- Water
- Prepared wine bottle or preserves jar *Note: For decorative purposes only
Procedure:
- Roll out Creative Paperclay® between layers of plastic wrap to approximately 1/8" to 1/16" thick. *Note: if Paperclay® is rolled out too thin, embossed portion will pull away from label.
- Cut out rectangle shape for label. Emboss by pressing part of label into mold to transfer design.
- Wet back of label and bottle or jar. Apply to glass surface. Smooth edges into surface. With wet finger, smooth out any irregularities. Let dry.
- Coat with multi-purpose sealer. Let dry. Paint entire label with basecoat then add design or pattern. Let dry.
- Antiques with Heavenly Hues of Color. Let dry. Add special message with permanent markers. Apply 1 to 2 coats of satin varnish. Let dry between coats.
Instructions for Lids:
- Take a ball of Creative Paperclay® and spread it into a circle using your fingers.
Push Paperclay® into a Heritage Mold and over the edge of the mold. Trim off the excess with your fingers. Wet the back of the label and lid top. Apply label to lid and smooth edges into lid. Let dry. Seal, paint, antique, and varnish as steps 4 and 5 above. *Note: If embossed label lifts off glass or metal surface, apply some white glue to back and apply pressure. A rubber band can hold label in place while it dries.

